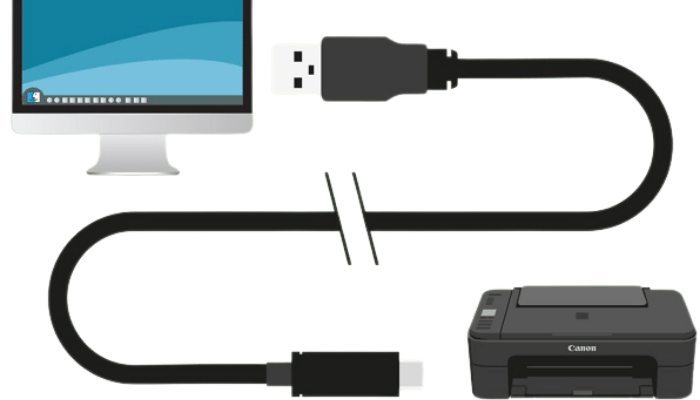
How to connect the printer to the computer?
The newer 10-button network printers are actually integrated devices with no fewer than 10 function buttons. As a result, they can be difficult to program if you’re a new user. The question How to connect the printer to the computer? is quite common.
There are several methods of setting up a printer on a network (usually called a WAN printer), and I have provided instructions for each of them below.
If you just want to connect a printer with a dial-up connection, you might have a printer with one or more dial-up ports. If so, check with the manufacturer to make sure it can access a dial-up modem.
Or You have a printer that doesn’t have a serial number (which is often the case) or doesn’t have a serial number for a network, you can enter the serial number into the back panel and then a website or email address. For example, a set of office scanners with Serial Number A1E0122-6F2F-43C0-B2B3-10B54688B67 could access a printer connected to a company server (C0F02) at 123.45.43.88.
How to connect the printer to the computer?
After connecting the printer to the Computer, you will need to find the IP address of the printer. Open a web browser and type the address of the printer you want to connect into the address bar, and your browser will open to the printer’s webpage. If your printer has multiple web pages, you may need to open only one of them.
Some printers will let you add your username and password; other printers will require you to enter a password that you’ll need to remember. The password has to be different from the username; if they’re the same, the printer may not recognize your login.
For example, if your username is jrodgers@example.com and your password is the password, you’ll need to use password1. The other best method for using an old printer is to connect to it from a computer that has a limited set of commands because it won’t have all the features that you need to do things such as set a color or monochrome setting. It would be simple to set the printer to black and white, but you’d need to enter the command “white” in order to turn it on.
Back to Top
1. How to Add Printers to Your Network
1.1. Using Network Printers from Another PC on the Network
This method requires a Windows-based computer with internet connectivity.
First, find the wireless network that you will be using to print from the printer. The easiest way to do this is to connect to the network with a wireless printer. Most printers will automatically detect the network to which they are connected and work with it.
1.2. Set up a Network Connectivity Manager
Begin by logging onto your computer using a networked network adapter (such as an Ethernet network adapter or wireless network card).
Now set up a connection manager that will allow you to connect to printers on the local network. Many printers will provide a networked function for setting up connections between their printer and a computer; in this case, you will connect to the printer using the built-in network function.
Select the Start menu and then “Control Panel” or “Windows Control Panel” to access this function. Click “Network and Internet Connections” to open the Network Connections window.
In the “Add Connections” dialog box, click the “Add” button.
Select the “PC Connection Manager” entry to open the new window.
Click “Add Network Device” to add a new network device, which is the new printer.
In the “Network Information” window, type the IP address of the printer you just added, and then click the “OK” button.
Now click “OK” to save your changes.
Open a web browser and visit the IP address that you set up, and the page should show “Ready” or “Active” in the Hardware & Network Options section, which means the printer is connected.
1.3. Using “Printer Sharing” Programs to Add Printers to Your Network
Printer Sharing is a network printing method that is popular in the education, nonprofit, and office printing markets.
If you use Office for Windows, you can access an Office For WINDOWS Document Library. While this may be enough for some people, I recommend using a printing application to make this work. I found that instead of sharing individual files, many of these software programs also accept a form of the ZIP file to be sent to the printer. This makes it a lot easier for people to share large files. I try to explain to you how to connect the printer to the computer?
Printing
1.4. Inserting a ZIP File in Printer Sharing
On the Network Sharing tab, choose “Send Zip File” and the program will open the ZIP file. If the printer doesn’t recognize the ZIP file (for example, if it was created on a Windows computer using an older version of the ZIP format), it will prompt you to make the ZIP file a Microsoft Portable Executable (MPE).
1.5. Printing Files in Printer Sharing
1.5.1. Inserting a ZIP File in Printmaster
To open this application on a Windows computer, click the “Microsoft Printmaster” button on the toolbar.
Click the “Paste” button to make a copy of the ZIP file.
The copy program will be launched. Click the “My Documents” folder that you created on your computer earlier to select the file that you want to send to the printer.
Paste the file into the window and click “OK”.
1.5.2. Using Copying
1.5.2.1. Insert a ZIP File in Copier Creation Tool
On the Copier Creation Tool tab, choose “Printer Creation” and the program will open.
Click the “Printer Creation” button and the file will be inserted into the print file window.
1.5.2.2. Downloading the ZIP File
1.5.2.2.1. Paste a ZIP File in Manage Printer Forms
Click the “Printer” menu and choose “Printer Management” to open the printer management window.
On the Manage Printer Forms tab, click the “Printer Creation Tool” button.
Enter the ZIP file URL into the form.
If you don’t have a public network or public internet connection, the URL will be the IP address of the network you are using to connect to the printer.
It may take a few minutes for the form to be populated, but when it is done, click “OK” to save the form.
Select “Printer Management” and click “Printer Creation Tool” again to open the printer creation window. Now, How to connect the printer to the computer? is not difficult for you.
Hope You know the answer Now: How to connect the printer to the computer?
Also Read:How to Make amazing Custom Mobile App Development by Intellexal Solution