How to Draw A Park Easily
How to Draw A Park. A park is one of the most peaceful and relaxing places to unwind.
Also check our cats coloring sheet.
Whether you want to relax on a park bench with a favorite book or toss Frisbee for a furry friend, there’s plenty to do at a park to have fun!
As fun as visiting a park can be, learning how to draw a park can also be great fun so you can create your perfect spot.
To design your perfect park, look no further than this tutorial!
How to Draw A Park
Step 1
In this park drawing guide, we will build individual elements to create this beautiful park.
To do this, we work in layers from bottom to top. First, we’ll use jagged lines for small bushes in the image’s foreground.
After drawing these bushes, let’s add some simple curved lines nearby to get some terrain detail.
Next, we’ll draw some longer curved horizontal lines for the start of the path that we’ll be adding soon. Once this route outline is drawn, adding some of these details is next.
Step 2
In this second part of your drawing of the park, we will draw some details of the route you started earlier.
We aim for a paved look for this path, and We can achieve this effect with irregular round shapes along the path.
Once you’ve drawn those rock details, let’s add two lamp posts to the side of the path.
You can use a ruler for the poles these lights stand on and draw the lamps’ tops.
Step 3
Parks usually have trees and other plants growing to make them even more beautiful and provide shade.
In this step of our how-to draw-a-park guide, we will add some cute pine trees to the location.
These trees have some short, slightly curved lines for their trunks, and then you can draw the rest of the trees using more curved lines that curve into sharp points.
The reference image shows that they also get thinner as you go up. Finally, for this step, you can draw another slightly wavy horizontal line near the base of the trees for a more significant portion of the landscape.
Step 4
We have already mentioned that many plants are often growing in parks, so that we will add some small bushes to the picture.
These bushes are drawn with lines similar to those you previously drew in the foreground.
However, these bushes will be more numerous, and you can add several of them to the wavy horizontal line you drew in the last step.
You can change the size and design of these bushes if you want to customize the image a bit!
Then we move on to the next step, where we put the finishing touches.
Step 5
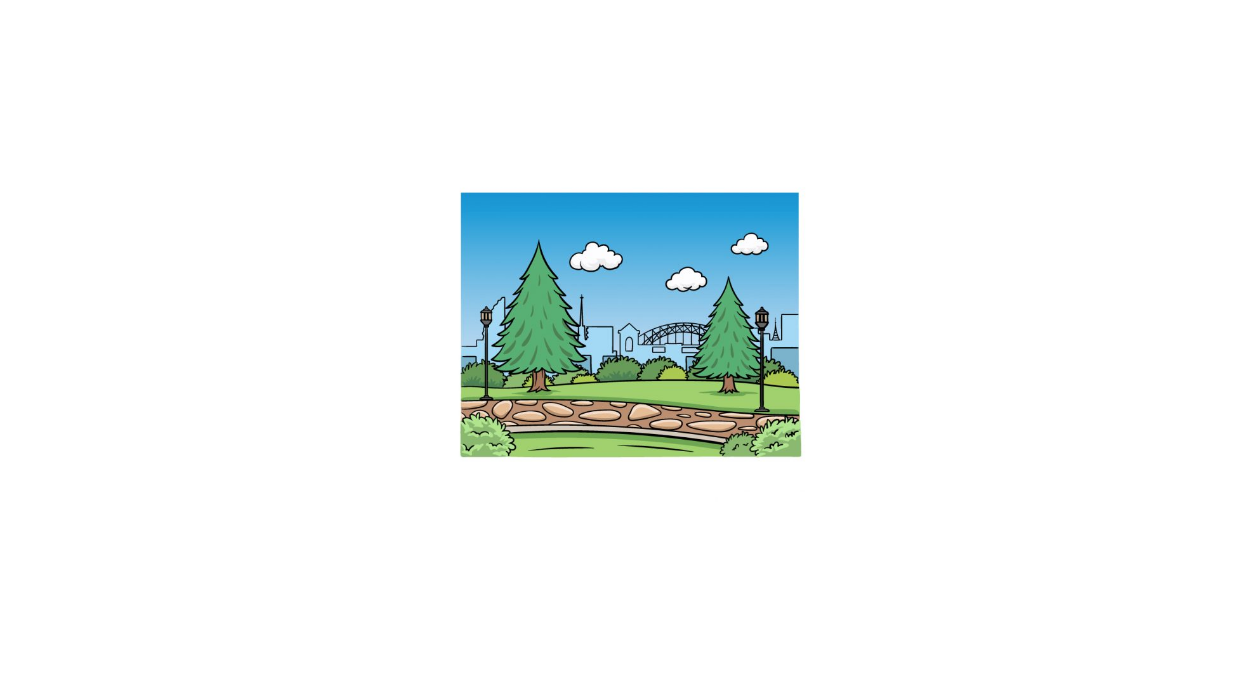
In this step of our guide on drawing a park, we will finish by drawing an excellent city background.
We used a combination of smooth, curved, and straight lines to create a backdrop of skyscrapers and even a church tower. We also added a wire jumper with more curvy lines and finished it with fluffy clouds over the city.
This will complement our detail choices, but you may want to tweak it to suit your preferences!
A fun touch would be to change the city in the background to have some characteristics of the city or country you live in. You can also add some fun additions, e.g., B. People are walking in the park or at other functions.
Step 6
All this park design needs now is some fantastic colors to top it off! Our sample image used different shades of green for the plants and trees.
We also incorporated some brown tones for the tree trunks and path and finished with lovely blue tones for the sky.
We chose these colors, but you can use other colors you prefer! You could change the weather for the picture by adding shades of gray to the sky.
Your Park Drawing is Finished!