Netgear EX6110 AC1200 WiFi Extender Setup
Netgear EX6110 Setup is not complicated, and it can be finished in within ten minutes. EX6110 users have two options for installing the Netgear EX6110 Extender: W.P.S or Manual Setup. If your home network does not support W.P.S., it may be difficult for you to complete the Netgear EX6110 extender Setup. If this is the case, you can utilize the manual setup to get your Ex6110 Extender up and running.
How can i setup my Netgear EX6110 extender with manual method
To set up the Netgear EX6110 WiFi Range Extender, follow the steps below:
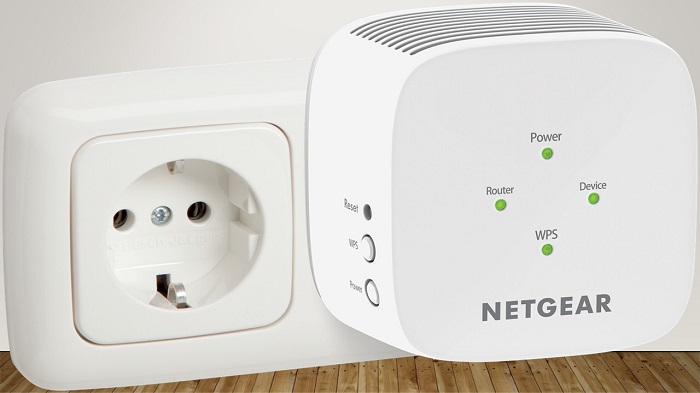
- To set up the Netgear Ex6110, turn it on and connect it near the router.
- Wait for the Power light on your Netgear Ex6110 to turn solid green.
- Go to your device’s Wireless options and connect to the Netgear Ex6110 Network once the light is solid green.
- Visit mywifiext.net after connecting to the Netgear Ex6110 Network.
- The button for New Extender Setup will now display.
- When you click the button, you’ll be given the option to create a Netgear genie setup account.
- Hit next when you’ve registered a Netgear genie account.
- The next option is to use a Wi-Fi Range Extender or an Access Point.
- If you want your Netgear Ex6110 to act as a Wi-Fi range extender, select the first option. If you want it to act as an access point, select the second option.
- To finish the Netgear AC750 Setup, follow the on-screen prompts
- If you require technical assistance with the setup, go to mywifiext.net and get live chat support.
Netgear EX6110 extender Setup via WPS method
One of the simplest and quickest ways to connect your Ex6110 to an existing wifi system is to use the Wireless Protected Setup (W.P.S) method. To set up your Netgear AC1200, follow the instructions below to install the extender.
- Plug your extender near your router to install your Netgear EX6110 with W.P.S.
- When the Netgear Extender’s Power light is solid green, it’s ready to use.
- On the EX6100 Extender, press the W.P.S button
- The W.P.S light on your EX6110 will begin flashing green.
- Your Home Router’s W.P.S button must now be pressed.
- The W.P.S light on your extender will turn solid green after 2-3 minutes.
- You can now move your extender to the location where you don’t have adequate internet access.
- Note: If your router does not have a Wireless Protected Setup (W.P.S) button, connect your wifi range extender using the Manual EX6110 setup.
Firmware Update for Netgear EX6110 Extender AC1200
On a regular basis, Netgear publishes the most recent security update for its devices in order to improve security, performance, and bug fixes.
Make sure you have the most recent security patch updated to get the most out of your wifi range extender.
So, in the list below, we’ll show you how to update the firmware on your Netgear EX6110 WIFI extender to the most recent version:
To access the mywifiext.net login page, connect your laptop to the Netgear EX6110 WIFI network.
In the address bar of any web browser, type www.mywifiext.net.
You’ve arrived at the AC1200 login page; enter your username and password to log in.
- Click the “Settings” tab once you’ve signed in to the Genie page.
- Select “Firmware Update” from the drop-down menu.
- Then select “Check” from the drop-down menu.
- Now, if a new update is available, select “YES.”
- Your WIFI booster is now updated to the most recent version.
How to reset my NETGEAR WiFi Extender EX6110?
Plug your ac1200 wifi extender into the socket and wait for it to switch on to reset your Netgear EX6110. The light on your EX6110 wifi extender will be solid green after it is turned on.
Steps to reset the Netgear EX6110 extender are as follows:
- Look above the WPS button on the left side.
- The Netgear EX6110 reset pinhole will be visible.
- Now you’ll need to find a sharp object, such as a needle or a paper clip.
- Do not unplug your AC1200 EX6110 while attempting to reset it.
- Insert the paper clip (or whatever object you’re using) into the reset hole.
- Keep the pin pressed in, and the extender’s power light will begin to flash amber.
- Remove the paper clip and wait for the power LED to turn solid green before proceeding.
The methods outlined above are simple to follow and work around; they should take no more than 2-3 minutes to complete. If you have any questions, please don’t hesitate to contact us.