The Most Effective Method to Pick and Fit a Rucksack
While choosing a pack, you initially consider how much limit you need. Preferably, your group ought to be sufficiently large to include all your stuff inside, except the things you deliberately decide to connect to the outside. Conveying a sack more significant than you want implies you’ll get additional weight.
Sorts of packs
Take a gander at the pack wall in any MEC store, and you’ll see there are many styles to browse. Some are intended for explicit exercises like mountain trekking or trail running; some are more flexible and adjust to various experiences. Consider how you’ll utilize the pack most frequently, assuming you’ll require it to work for one movement or many. Save money on your order and get 30% off using the Kanga Coolers Coupon Code.
Shop all gathers and sacks
These little workhorse packs are intended for your regular convey or for climbs and exercises that last a couple of hours yet under a day. They are best for giving loads under 10kg, as your shoulders uphold the weight as opposed to your hips. Except if they’re an ultralight model intended to stash in a pocket or inside another pack, they, as a rule, have a gently cushioned backboard and no unbending inside outline.
Search for:
- Lattice or venting channels down the back to assist with keeping you cool
- Abdomen tie to keep the pack from skipping or moving; for this size, it won’t have to bear weight
- Hydration sleeves and ports if you intend to utilize a hydration framework
- 10-25L limit
Hiking and undertakings
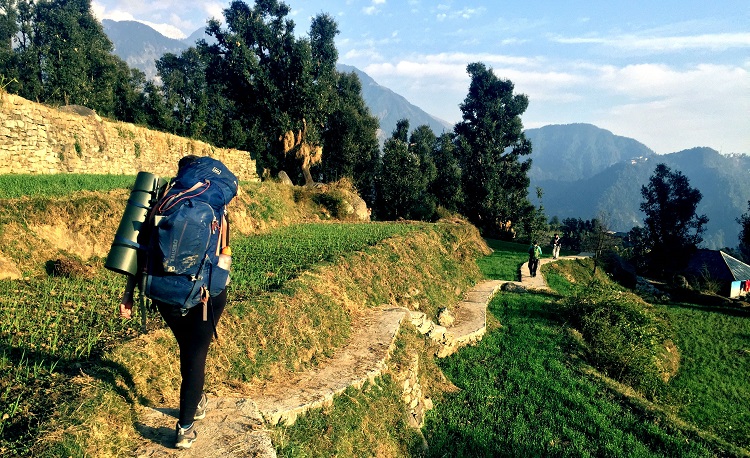
Estimated for multi-day experiences, these packs convey heavy burdens serenely. A side zipper or a different compartment for a hiking bed is convenient, so you don’t need to unload all your stuff to track down only one thing. A few loads accompany separable side pockets or a removable top you can leave at home on the off chance you needn’t bother with the additional limit regarding an excursion.
- Significant inner casing to help weight
- All-around cushioned, movable hipbelt, shoulder ties, and backboard
- An outside pocket to store wet stuff
- Top, side, and base access
- Lashes outwardly for appending gear
- 55-70L for exploring and up to 100L for campaigns
- Travel packs
For objections where wheeled baggage won’t work, a movement pack may be significant. Fabricated like a knapsack, they typically have a cover or zippered board to conceal the lashes, belts, and clasps, so they don’t get caught in baggage merry-go-round or broken during travel. A detachable daypack is, much of the time, an element. It gives you a little pack for road trips as your portable suitcase and offers the additional ability to bring back gifts.
- Inward casing to help weight
- Cushioned hip belt, shoulder lashes, and back
- Separable daypack or cover
- Pocket or board to cover shoulder lashes and hipbelt
- A principal pack or divisible pack is measured to meet portable limitations
- Inward coordinators to keep attire and shoes organized
- 45-75L limit
- Climbing or cragging
Most climbing packs make them cushion to help the heaviness of ropes and stuff you carry on the way to deal with a course. Those made to convey while you climb usually are intended to sit high on your back, so they don’t disrupt everything while cutting stuff on the back circles of your outfit. They ride near your spine to keep the weight focused and adjusted. The plans are generally negligible, without outside includes that could catch on rock highlights as you climb.
For climbing, extreme texture, hardly any outside pockets, and stuff circles on the hipbelt for quick racking.
- For cragging, cushioned backboard, shoulder lashes, and hipbelt
- Cross-section or venting channels down the back
- Huge primary compartment to hold loads of stuff
- Lashes to convey a curled rope outwardly or under the cover
- Circles for ice tomahawks, protective cap, or additional stuff
- 30-50L limit
Mountain trekking and riding
Trekking packs are generally daypack-sized yet have extraordinary compartments to stash your devices, protective cap, and covering. Search for a group that remains nearby your body when you’re in the ride position. The hipbelt shouldn’t move up, so it dives into your stomach. Furthermore, you ought to have the option to change the pack, so it doesn’t move or bob when you ride lopsided territory. A few packs incorporate a hydration repository. Assuming you intend to utilize your supply, ensure it fits in the sleeve and that the openings and ports are viable.
- Midriff tie and sternum tie to keep the pack adjusted
- Softly cushioned shoulder lashes and backboard
- Hydration sleeves and ports
- Committed instrument pocket
- Ties to lash head protector and defensive layer
- 10-25L limit
Ski visiting, snowboarding, and snowshoeing
Assuming you hope to convey your skis or board outwardly of your pack, having a few options is helpful. For winter conditions and communicating security gear, a visiting group should have a steady edge, a framework to give you quick admittance to your digging tool and test, and a lot of space for your warm layers. A-outline style convey for skis keeps your pack adjusted, yet the additional level can be irritating if you’re under low-leeway trees or shakes. On steep landscapes, the tails of your skis can haul in the snow, and it may be a superior choice to fix them slantingly.
- Inward casing with a cushioned hip belt, shoulder lashes, and backboard
- Outer lashes to convey skis, snowboards, or snowshoes
- Quick admittance to your torrential slide gear
- Pockets or ties for scoop handle and posts
- A spot to stash wet skins
- Side access for comfort and to keep shoulder lashes off the snow
- 35-55L limit
Step-by-step instructions to fit a rucksack
Most huge limit packs come in various sizes to suit different body shapes. Search for a “back length” or “middle length” estimation while looking for a collection. It’s a superior sign of how the group will fit your general level. Assuming that it’s accurately estimated and changed, regardless of how enormous the pack is, it should feel like your own expansion body.
Measure your back length
Track down the most noticeable vertebrae in your neck at about a similar level as the highest point of your shoulders.
Measure the distance between these two focuses; this is your back length. Track down the highest point of your hipbone and follow a line to the center of your back.
Put around 8-10kg of stuff in the pack and relax the lashes. Make sure to slacken the stabilizer lashes at the highest point of the shoulder lashes.
Change and fit the pack.
The hipbelt ought to altogether cover your hipbones. A few packs permit you to raise or lower the situation of the belt.
Fix the hipbelt so it’s cozy however doesn’t confine your relaxation. Ensure it doesn’t move up or dip under your hipbones.
Pull down on the shoulder tie changes until they are effortlessly cozy. The lashes ought to lie level without clustering. They ought to lie level against your shoulders, without contacting your neck, and without an enormous hole between the highest point of your shoulder and the lash.
Gradually cozy the top stabilizer lashes. Pull them until you feel a sprinkle of weight on your shoulders.
Affix the sternum tie that interfaces the shoulder lashes and change it so your chest can extend typically.
Assuming stabilizer lashes are on the hip belt, cozy those for solace.
Stroll around and incline forward and back to check whether the weight feels adjusted. Change any focuses that are causing strain or scouring against your skin.
Care and fix
Fixing and putting away your pack appropriately will go quite far to making it last. Ensure it’s dry before you set it aside, and keep it out of direct daylight. You can use an old toothbrush to wipe the soil out of the zippers before setting it aside. If the zippers feel tacky and are not sliding without a hitch, take a stab at scouring a candle over the teeth and sliders to grease up them.