From Drab to Fab: DIY Kitchen Cabinet Makeover Tips
In many households, the kitchen serves as more than just a place for cooking. It’s where families convene for breakfast conversations, where secret recipes are passed down, and where the aroma of home-cooked meals evokes memories and warmth. Given its pivotal role, the design and feel of a kitchen can set the mood for the entire home. Central to this character are the kitchen cabinets. These aren’t just storage units; their design, hue, and even hardware play an instrumental role in defining the kitchen’s overall aesthetic.
But like all things, cabinets are susceptible to the ravages of time. The once-vibrant colors fade, handles might lose their sheen, and the wood can start to show signs of aging. While these signs of wear and tear add a touch of nostalgia for some, many homeowners find themselves yearning for a refresh. Yet, the thought of a full-blown cabinet replacement, with its accompanying costs and potential disruptions, can be daunting.
Enter the world of DIY! Home improvement isn’t just about knocking down walls or building extensions. Sometimes, it’s about rolling up your sleeves, grabbing a paintbrush, and breathing new life into what you already have. For those ready to reimagine their space without embarking on a full renovation, a kitchen cabinet makeover can be the transformative project they’re looking for.
Evaluating Your Current Cabinets: What Can Be Saved?
Before diving into the makeover process, it’s essential to evaluate your cabinets’ current state. Look for signs of damage, outdated designs, or fading finishes. Examine hinges, handles, and structural integrity. If they’re sturdy with only surface-level issues, they’re prime candidates for a DIY facelift.
Prepping for Success: Essential Preliminary Steps
Proper preparation is the key to a successful cabinet transformation. Start by cleaning the surfaces to remove any grime or grease. Sanding is next – this will ensure that paint or adhesive sticks effectively. Remember to remove old hardware, like handles and knobs, to guarantee a smooth, unobstructed working surface.
The Power of Paint: Choosing the Right Colors and Techniques
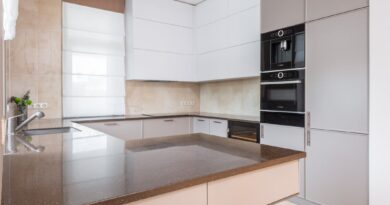
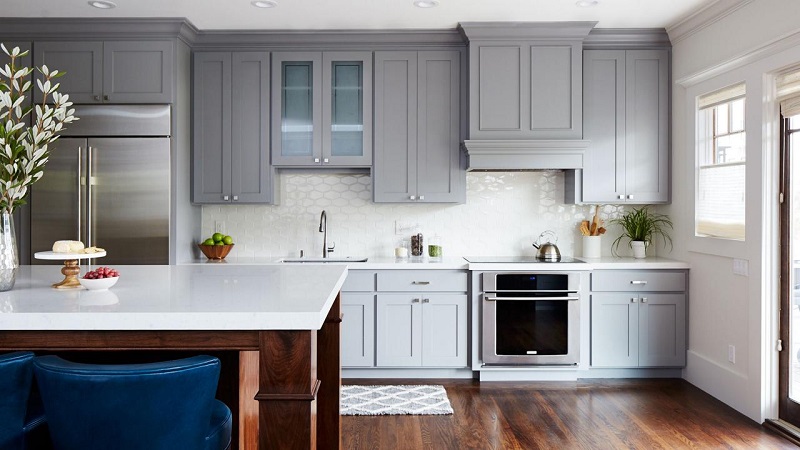
The transformative potential of paint is undeniable. With just a few strokes, you can dramatically alter the ambiance of your kitchen. When choosing colors, it’s crucial to consider both the current design trends and your personal preferences. While modern kitchens often gravitate towards neutral palettes, featuring shades like grays, whites, and soft blues, there’s a growing trend of homeowners injecting more personality into their spaces.
John from CabinetSelect highlights the importance of individuality in design. He advises, “Don’t be afraid to experiment with bolder hues, especially if you have a larger kitchen. A vibrant pop of color, be it a lively green or a radiant coral, can become a delightful focal point, adding a touch of zest and character.”
However, it’s not just about the color but also the technique. The key to a professional-looking paint job lies in the details. Begin with a good quality primer; this ensures the paint adheres better and provides a consistent base. When painting, it’s best to use thin, even coats, employing either a brush for precision or a roller for larger surfaces. Multiple coats might be necessary, especially if you’re making a drastic color change. Ensure you allow ample drying time between layers to prevent unwanted streaks or smudges.
Lastly, sealing is crucial. A protective topcoat, whether matte, semi-gloss, or gloss, not only gives your cabinets a finished look but also provides a barrier against wear and tear, ensuring your paint job remains fresh and vibrant for years to come.
Modern Hardware: Small Changes with Big Impact
Upgrading your cabinet hardware is like adding jewelry to a freshly tailored outfit. Trends nowadays lean toward sleek metals like brushed nickel or matte black. Consider the overall style of your kitchen when selecting new handles and knobs – what complements a modern kitchen might look out of place in a rustic setting. Installation is usually straightforward, with many pieces designed for easy DIY fitting.
Adhesive Veneers: A Quick Fix with a Professional Look
If you’re looking for a change that’s more substantial than paint but less drastic than replacement, adhesive veneers might be the answer. These thin layers of material can be adhered to the surface of your cabinets, providing a fresh, new look. The application process is meticulous but rewarding, and the result is a professional-grade finish that’s durable and stylish.
Budgeting for Your Makeover: Getting the Best Bang for Your Buck
A DIY makeover is cost-effective, but it’s still wise to budget. Factor in expenses for paint, veneers, hardware, and any tools you might need. Shop around, and don’t be afraid to hunt for deals. Remember, quality doesn’t always mean the most expensive option. With some savvy shopping, you can achieve premium results on a modest budget.
Maintaining Your Newly Refurbished Cabinets
With your cabinets now radiating renewed charm, it’s essential to maintain their luster. Regular cleaning, using non-abrasive cleaners, can keep them shining. Attend to any chips or damage promptly to ensure they remain in top condition. Take a step back and admire your handiwork. You’ve not only upgraded your kitchen but also added value to your home. Revel in the satisfaction of a job well done, and let your DIY spirit shine.